Global Mapper is able to geo-reference an image or pdf file and export it to be able to be imported as a jpg/jgw or GeoTIFF or another geo-referenced file type into other software.
Reasons To Georeference An Image or PDF File
The reasons you may need to georeference a pdf file or an image include:
- You want to digitize a paper plan to be able to extract geographic information from it,
- To overlay the plan or image in Google Earth Pro,
- To import a georeferenced image into Global Mapper Mobile, and navigate around using the phone application, and
- For presentation to a client or colleague of your data.
What Is Needed To Georeference Image
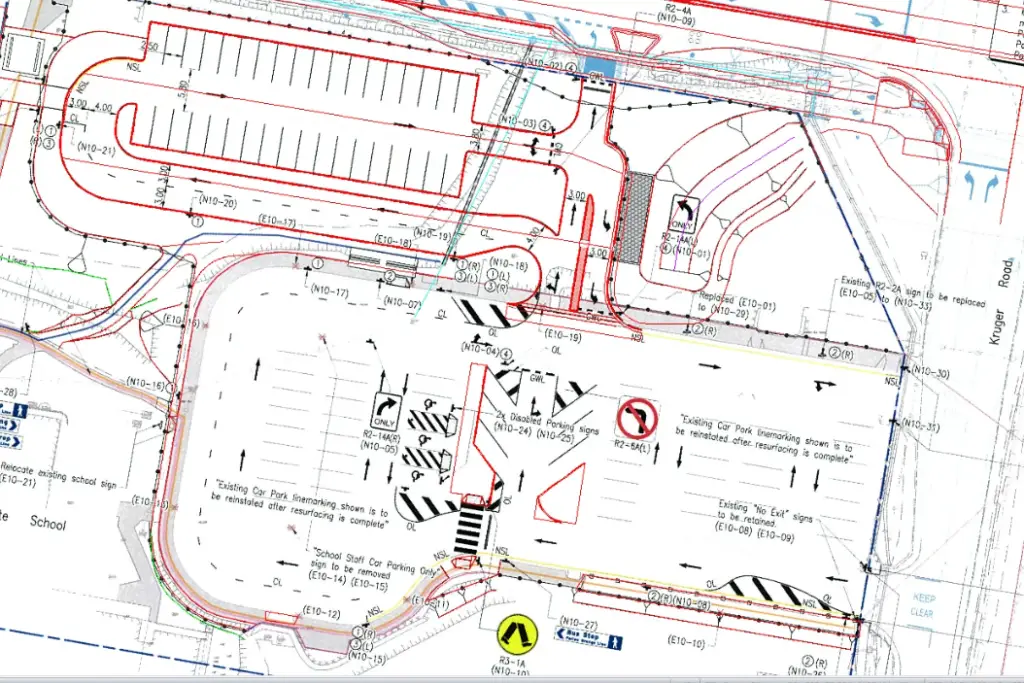
You need to have common points between an image and the design strings. To georeference this image common points will be selected between the image and design strings.
How To Georeference PDF/Image File In Global Mapper
Step 1

Step 2
If the design file coordinate system isn’t known from the file, you will need to select the projection, zone and datum for the design file.

Step 3
You will now need to drag the image file or pdf file that you want to georeference.
Simple drag the image from windows explorer into the Global Mapper model space.

Step 4
Review the options of the PDF options dialogue box. Once satisfied press ok.

Step 5
In this case since we are wanting to georeference the image, select Manually Rectify Image adion button and press OK.
This will open the image rectifying tool.

Step 6
In the image rectifying tool you now get to select common points between the design file and image that is to be georeferenced.

Step 7
Left click the common points between the image and design strings.

Step 8
Once you have selected common points, select Add Point to List. You will be prompted to enter in a point identifier, or you can just leave it with the default point identifier.
Continue to do this until you have selected 2 or more points. Ideally you would have at least 4 common point selected that agree with each other.

Step 9
The are several different types of rectification methods too choose from. My prefrence is to use Automatic as the rectification method.

Step 10
Once the common points have all been selected and the rectification method selected, press OK on the rectification tool.

Step 11
To view the results of the georeferenced image you will now overlay the design strings on top of the georeferenced image.
To do this just click and drag the image or pdf file underneath the design strings file. This means that Global Mapper will show the design string file on top of the pdf or image file.


Step 12
You will need to check different areas of the drawing to see how well the georeferenced image has been positioned.
Errors will arise if the common points used in the rectification aren’t selected accurately.
Below we can see a mis alignment in the kerb design strings. I will need to examine and delete the bad point and either re-select the point again or find an easier point to define.

Step 13
To re-rectify an image in Global Mapper, you right-click on it and select Modify Layer Position.

Step 14
Select the point that is throwing out the image position, and select delete.
Then re-select a common point (if required) and add point to the list. Then press ok and re-check the image rectification results.

Step 15
The strings and image line up better with each other now. I’m satisfied with the results of this image rectification.

Step 16
You can now export the georeferenced image as a georeferenced image file type. To do this simply:
In Global Mapper go to File >> Export >> Export Raster/Image Format.

Select the preferred file format. My preferences are to export an image as either a jpg/jgw file or a GeoTIFF file

If you are exporting a jpg image file you will also need to export a jgw file (this file will define where the jpg sits).

Final Thoughts
I hope you found this article useful. Using Global Mapper to transform and rectify images is very quick and simple. This article has explained how to image design data and an image into Global Mapper, geo-rectify an image using the design string file, and export a georeferenced image to for use in another program.
