In this guide, I will explain to you two different ways that you can setout a batter toe or a batter crest using the stakeout function in a TSC5. This method can be used for any survey controller brand though.
The limitations/drawbacks of this method are that it will work fine if you have access to the batter toe or crest. If the batter is fat you cannot peg the toe, or you need to do an offset, then the below method will not help you out. I do have a blog post on how to calculate and stakeout batters that may be useful for you though.
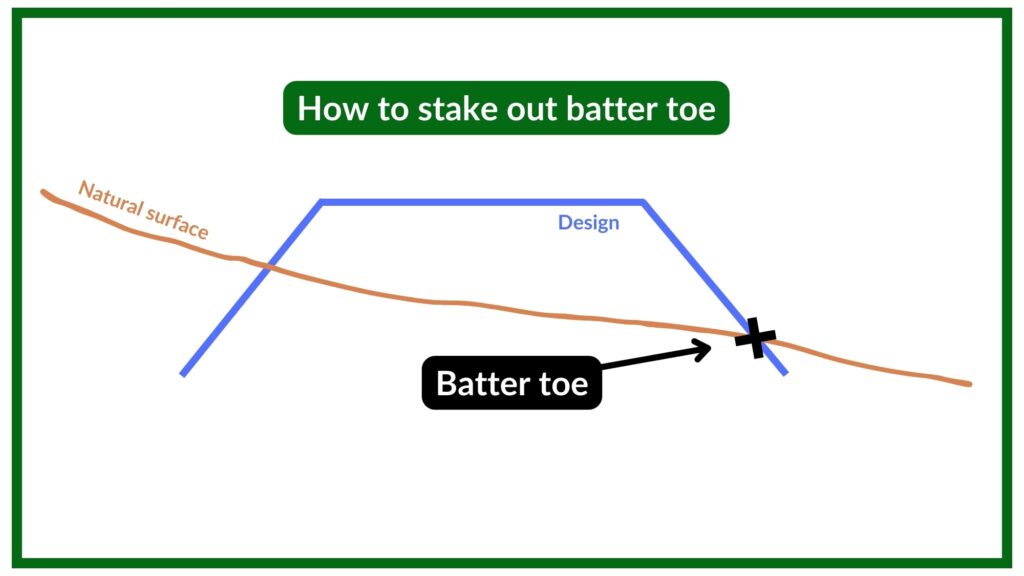
There are two ways to stakeout the batter toe or crest:
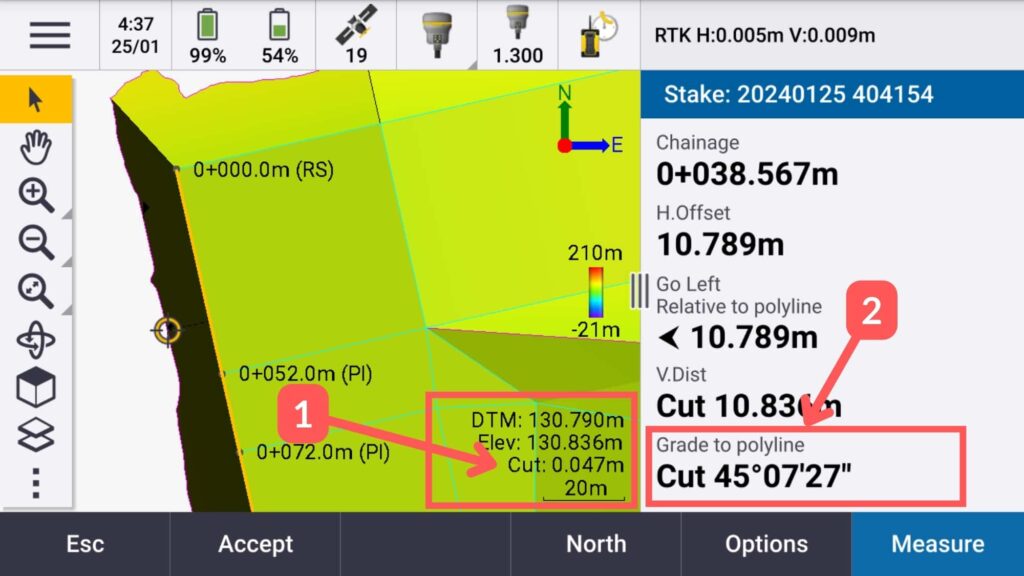
- Setout the surface DTM. When you see the cut/fill values to the DTM surface equal zero, you are at the intersection of the natural ground and design surface, which is where the batter toe or crest is.
- Setout the grade to the line. If you know the batter grade, you can stakeout the crest or the toe of the batter. Simply select which line you want to setout, if setting out the toe I would select the crest string, then turn on the Grade to polyline or Grade to line value in your display. Then move yourself until you are setting out the correct slope. In the below example, the design batter grade is 45 degrees.
See the below image showing the TSC5 screen setting out the toe of a batter using both of the methods described above, the (1) DTM method and (2) setting out the grade to string method.
Read my blog post about how I turn on the Grade to line / polyline option for the Trimble TSC5. You would be able to do this with most other survey controllers, and if in doubt contact your supplier.
How to setout a batter toe or crest (works with most controllers)
-
Load the design data into the controller
To setout the batter design you will need either or both, a *.dxf or *.dwg file with the design strings and a surface model that you can upload into the controller.
-
Select line to setout
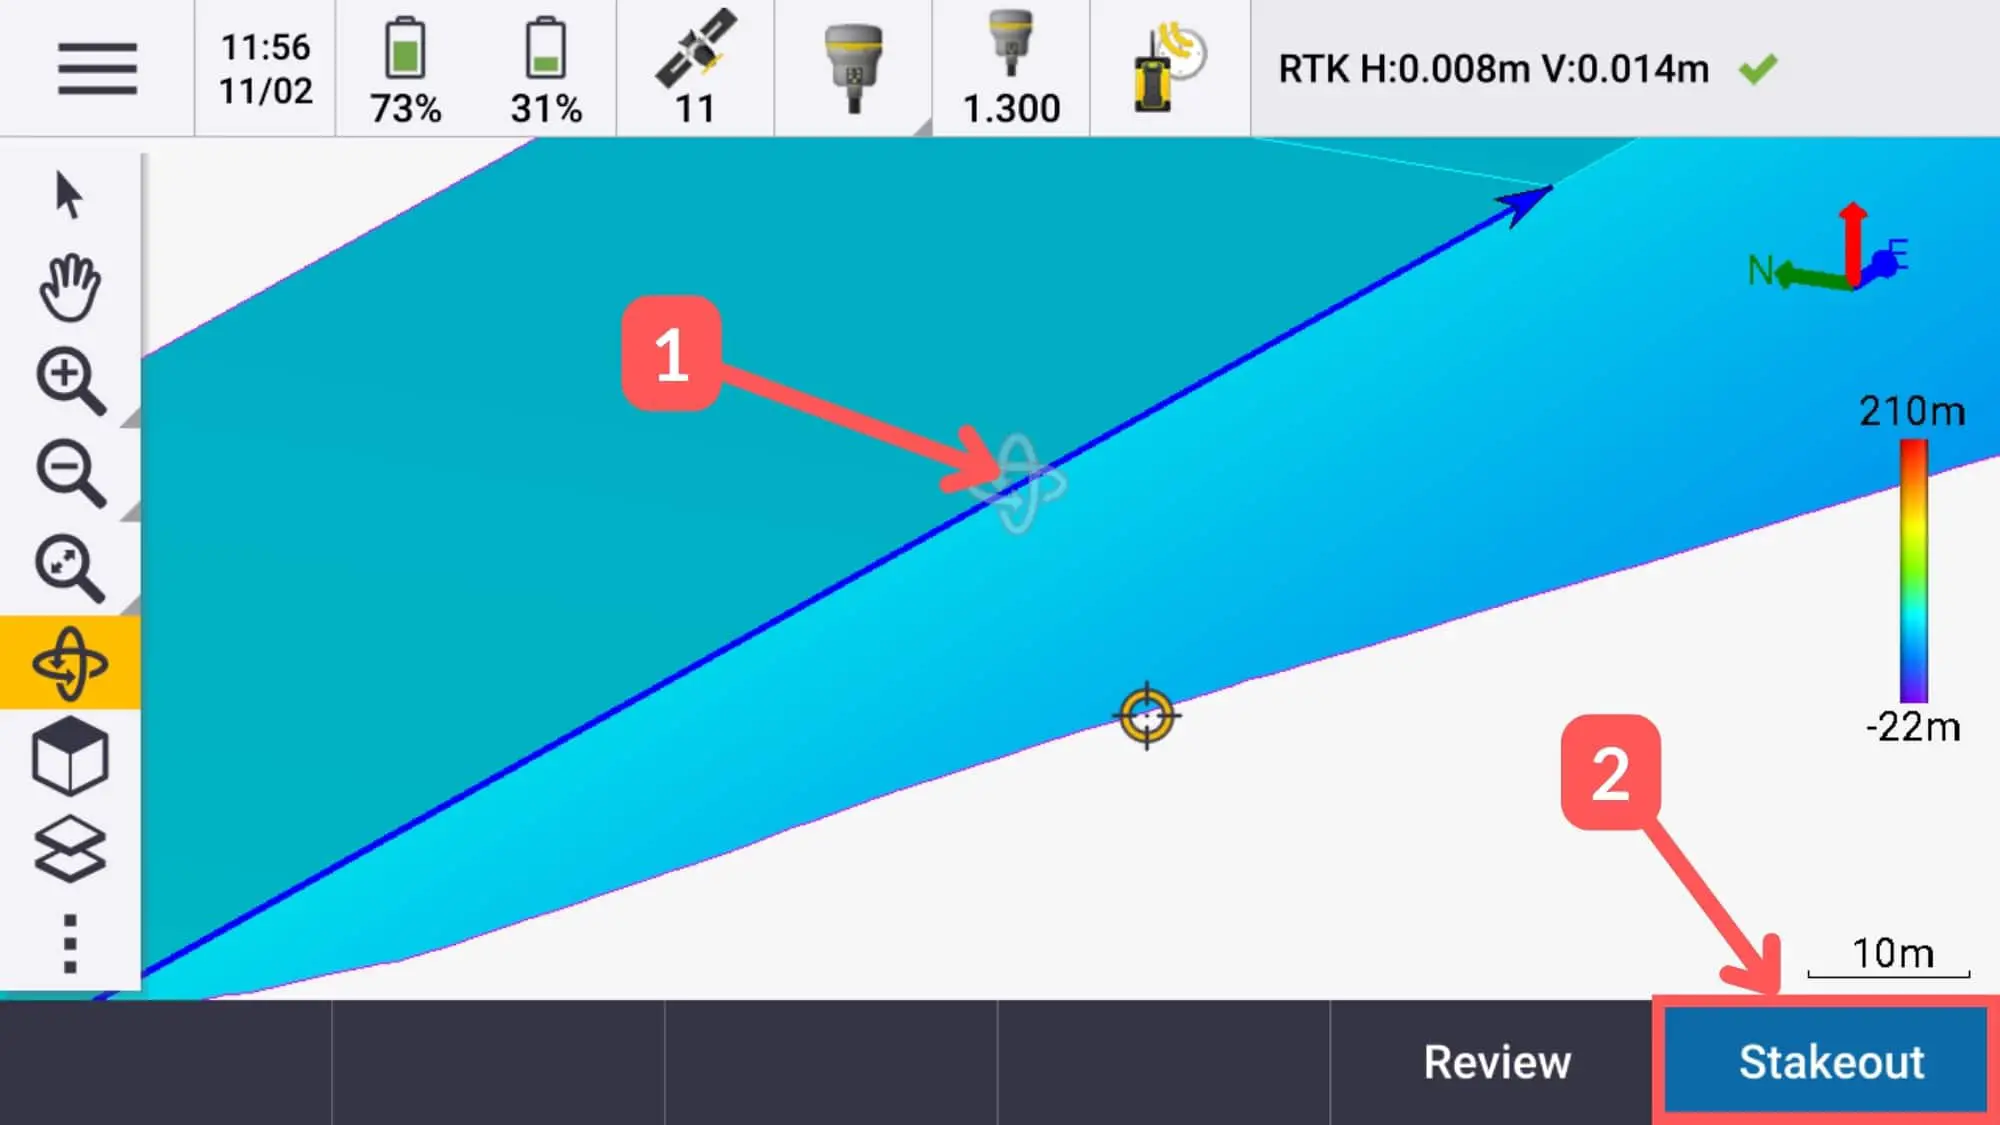
Since in the above example I want to setout the toe of a road, I’m going to setout the crest string and project it down at the design grade of 37 degrees.
-
Accept design string and setout information
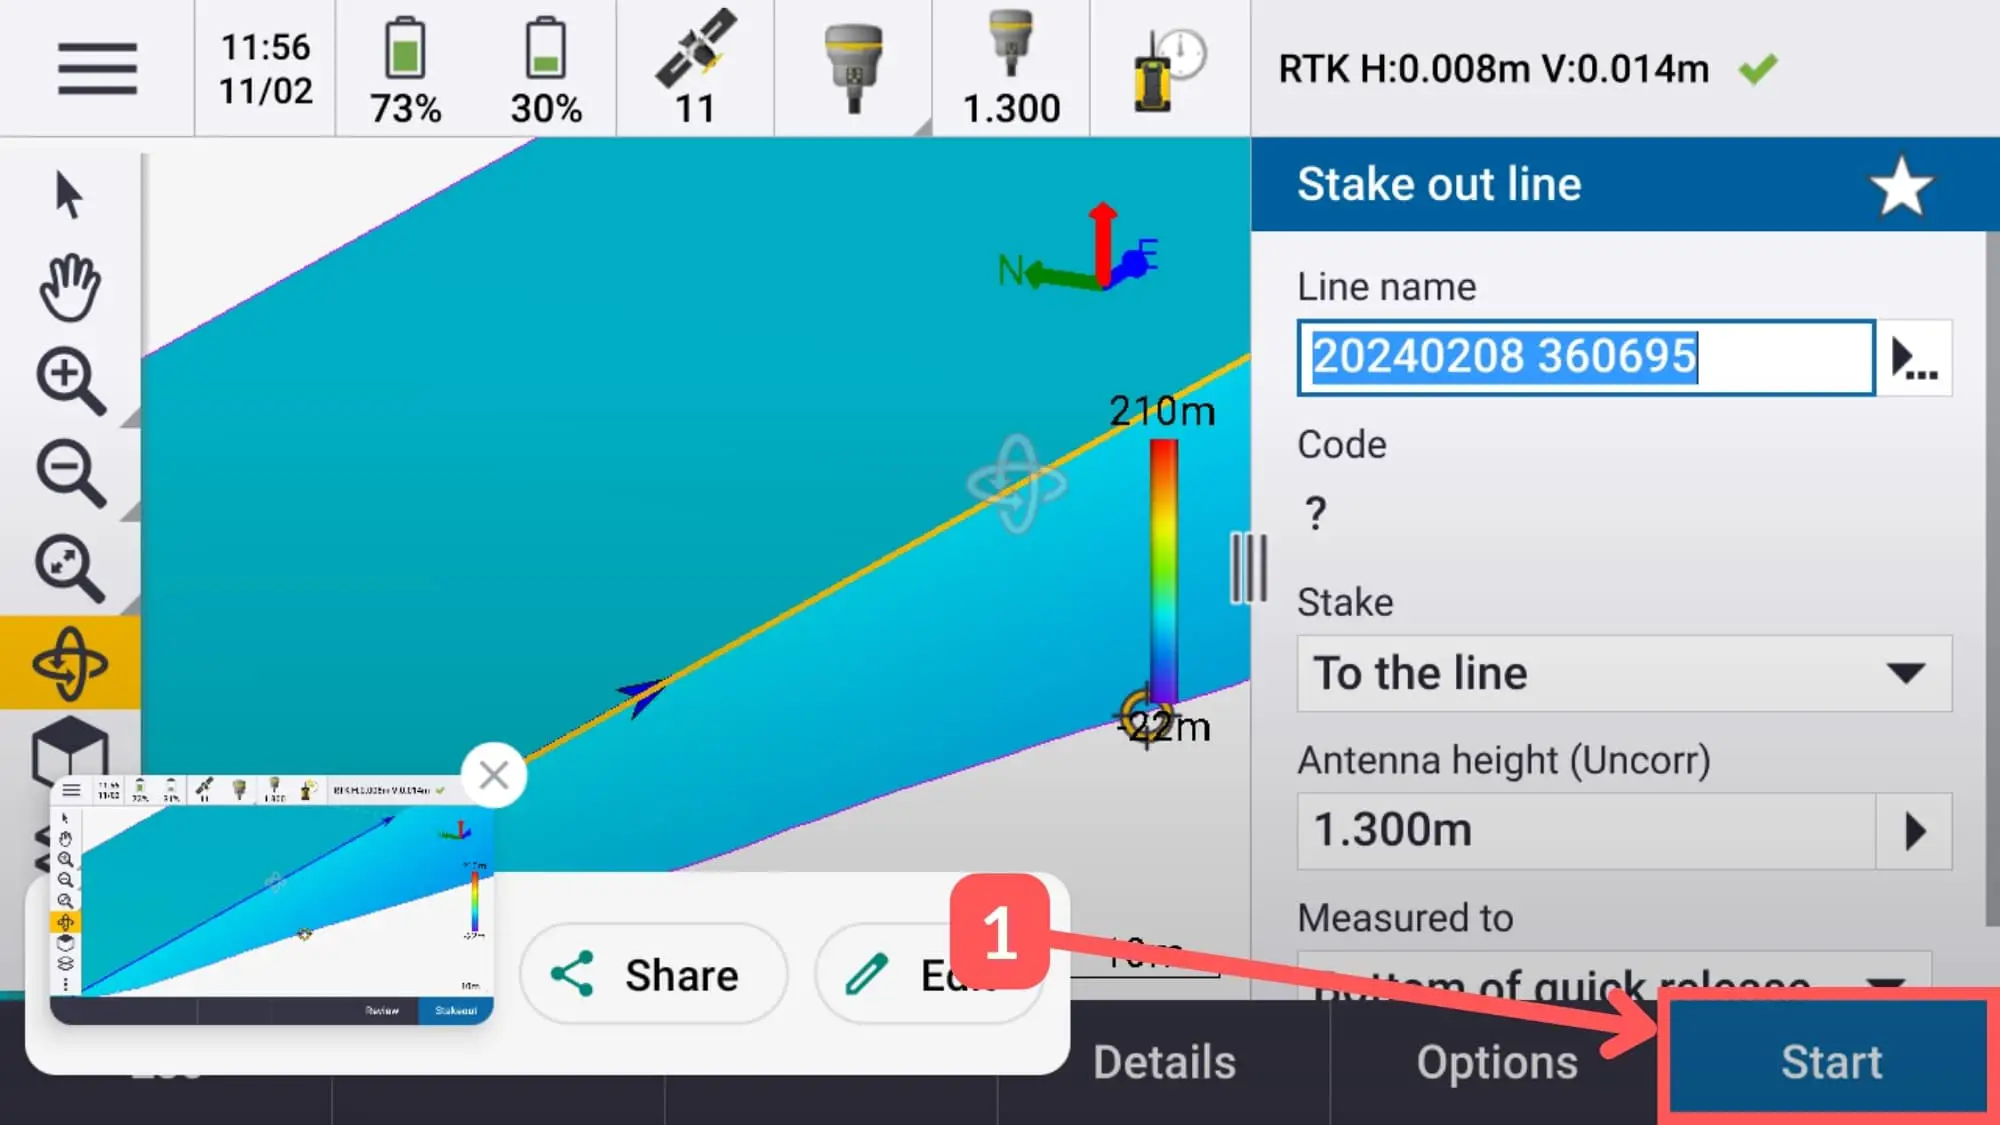
Check the stake out panel to ensure that you have the correct information in it, such as your antenna height. Click start once you are ready.
-
Stake out the road batter toe
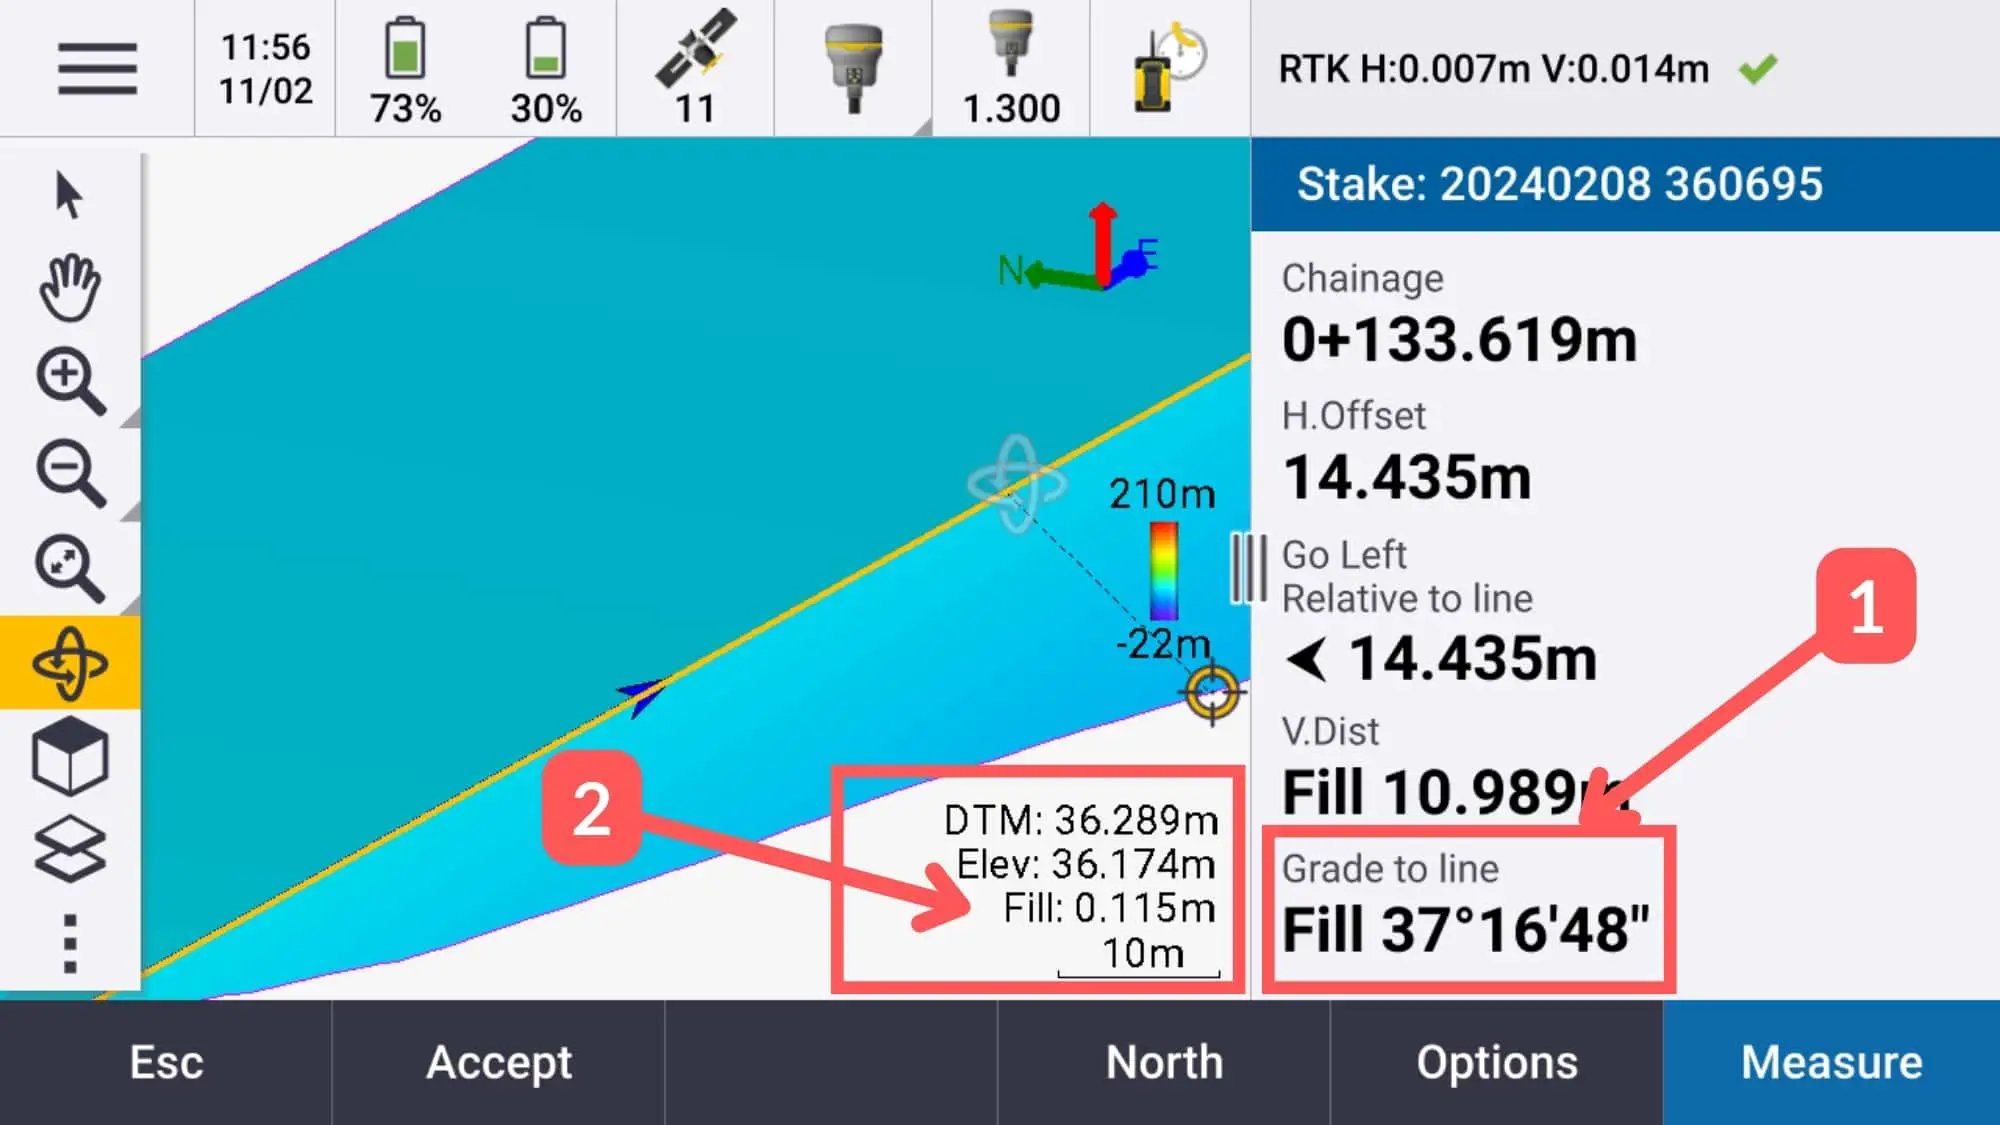
Stake out the toe by either setting out the design grade from the top string, or by finding where the design surface intersects with the natural surface.
