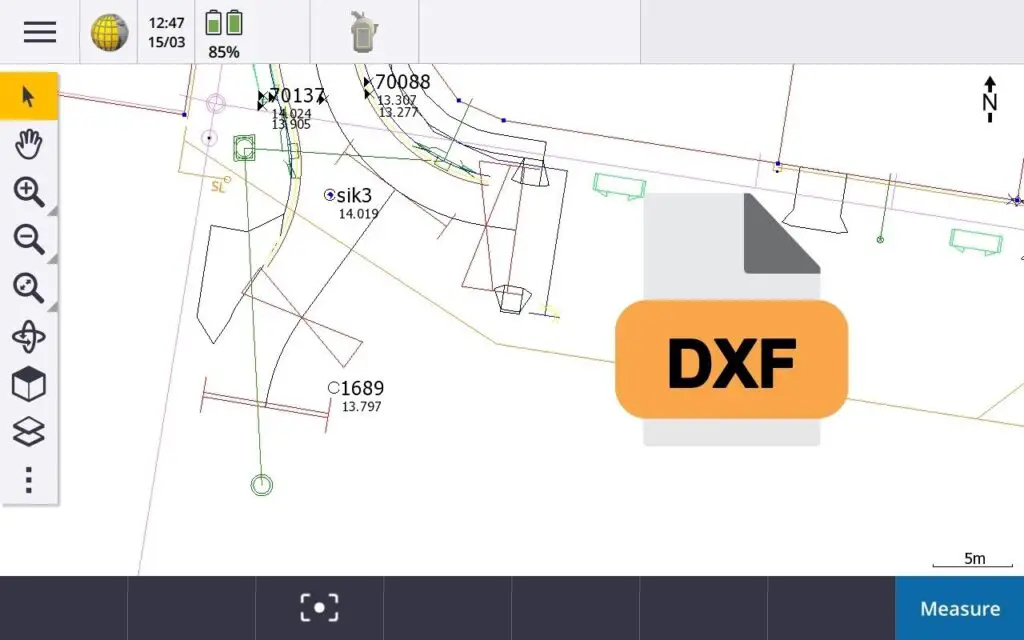
Surveyors use DXF files a lot in their day-to-day field and office work.
In the field, a surveyor would usually either have (1) a DXF file as a background map to help understand where they are on a site or (2) they would be selecting and setting out features from the DXF file.
The below steps will explain how to attach a DXF file to a job file in a Trimble TSC7 running Access.
The steps below also apply when adding other file types to jobs including:
- A Trimble Terrain Model (TTM).
- A CSV file.
- Trimble RXL files (alignment files).
How to import a DXF file into a job on a Trimble TSC7 running Access
-
Open the menu
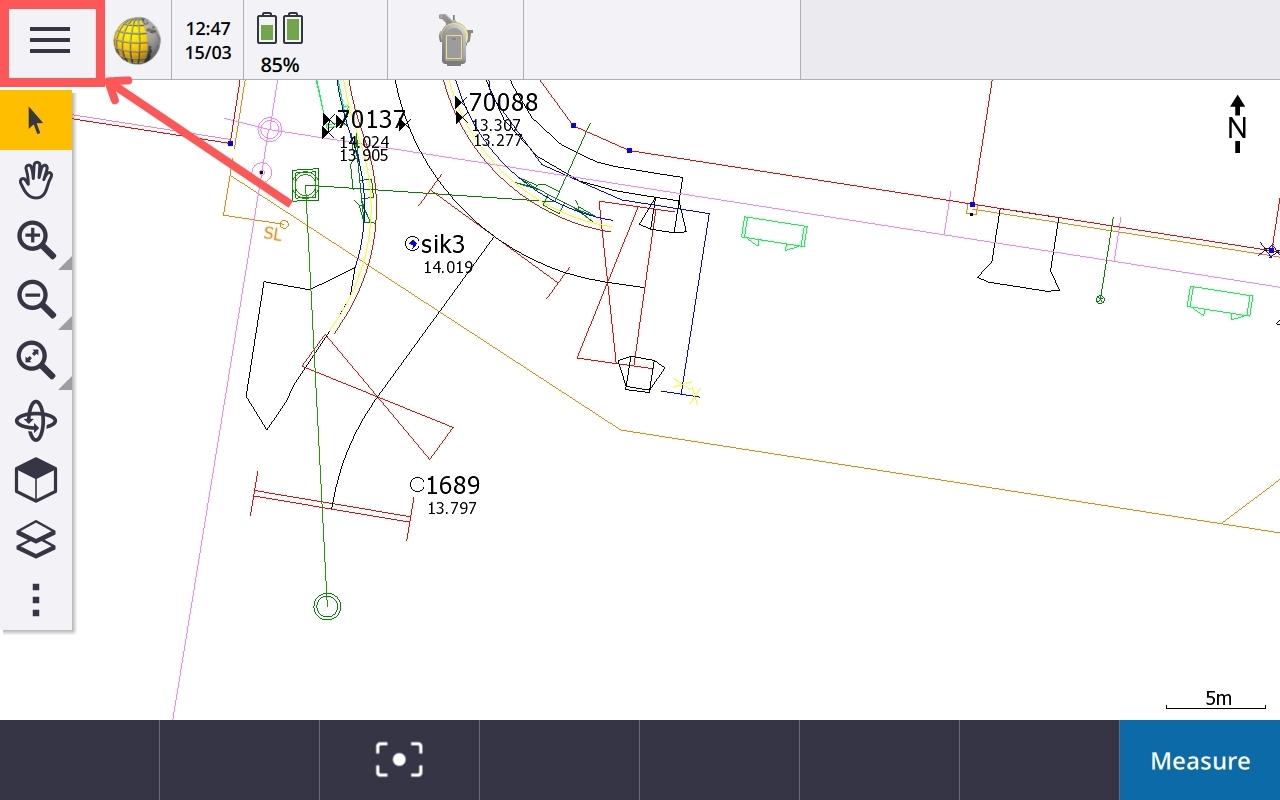
Click on the hamburger menu in the top left of the screen.
-
Open job
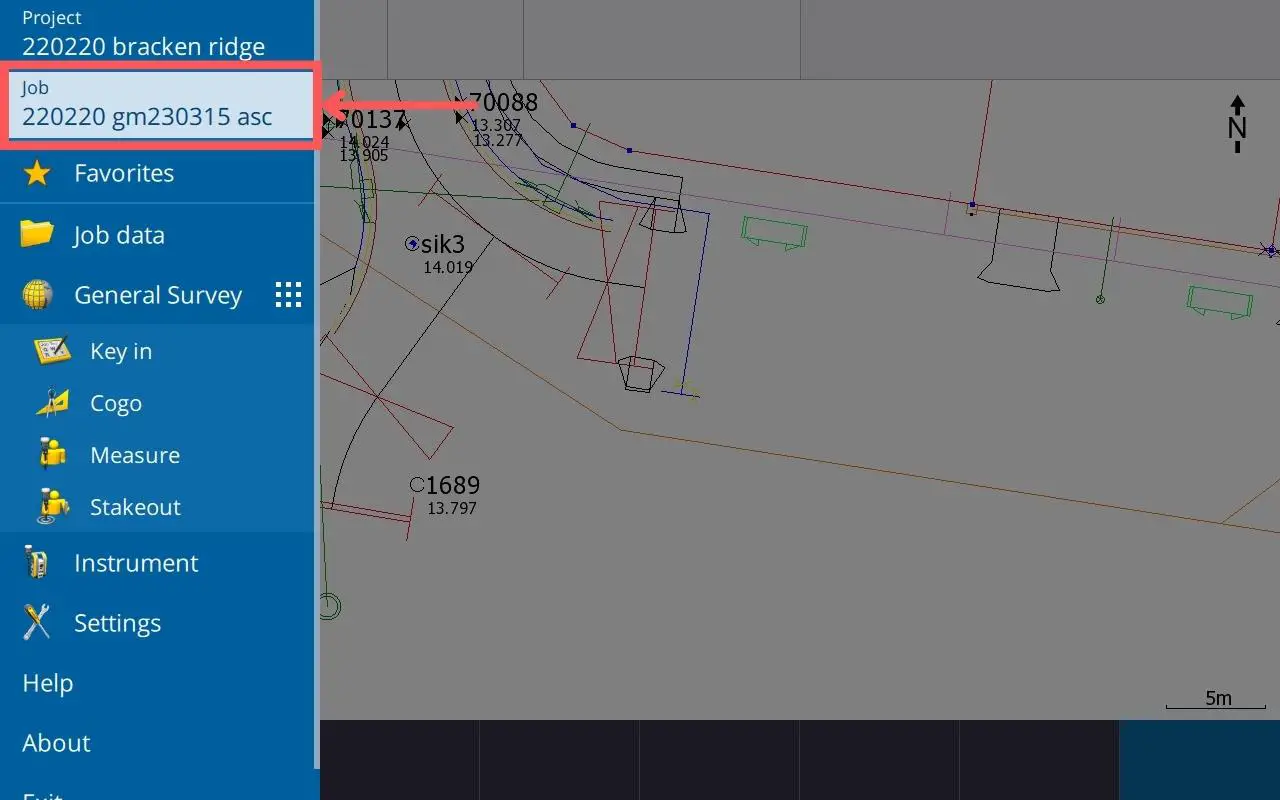
Click on the job name to open the job properties.
-
Open job properties
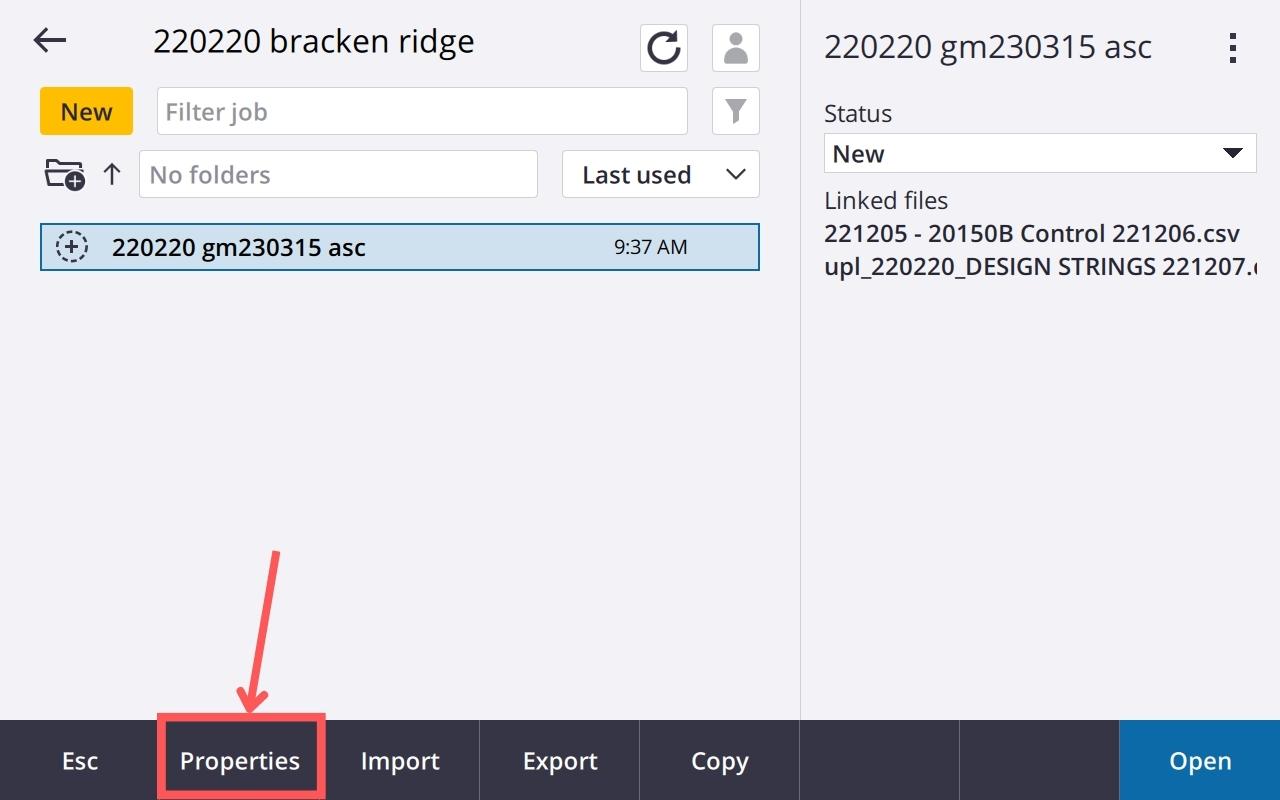
Click on properties to open the jobs properties.
-
Open layer manager
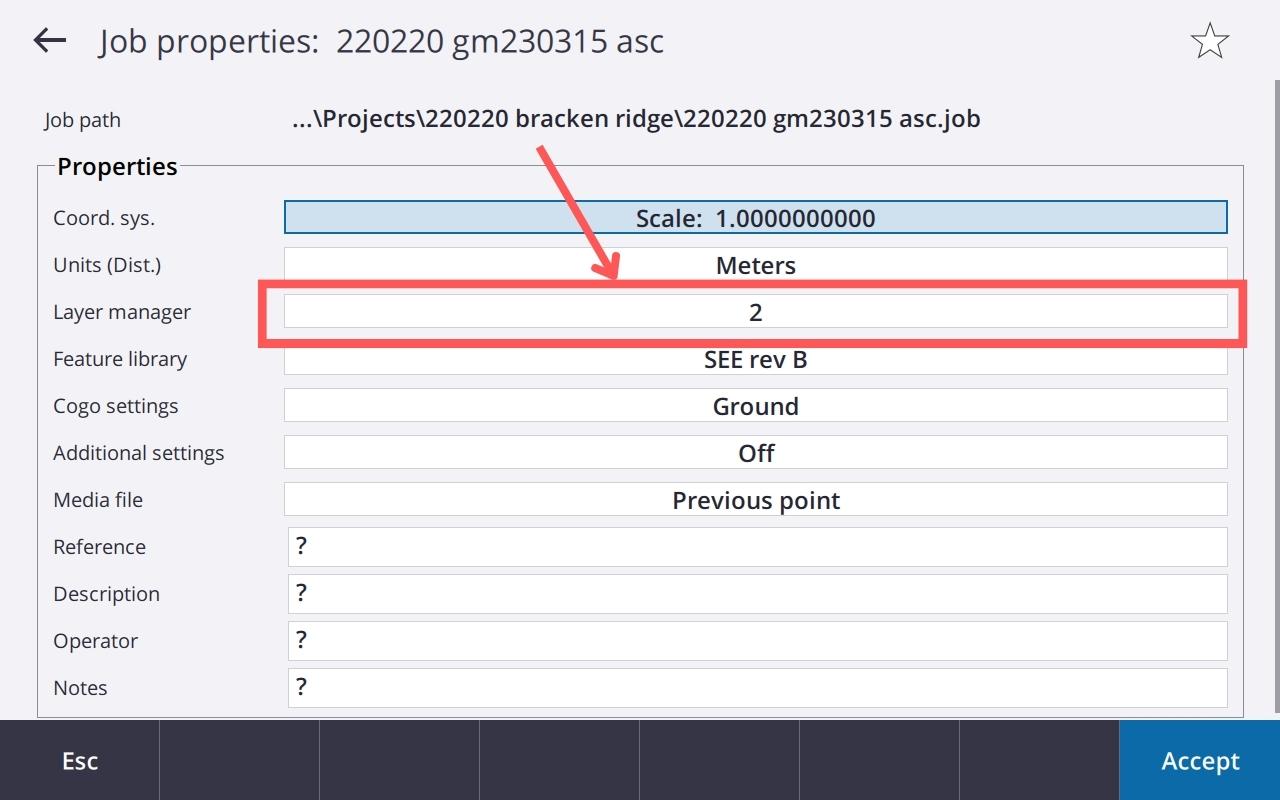
To add more DXF files to your job, click on the layer manager.
-
Search for new DXF
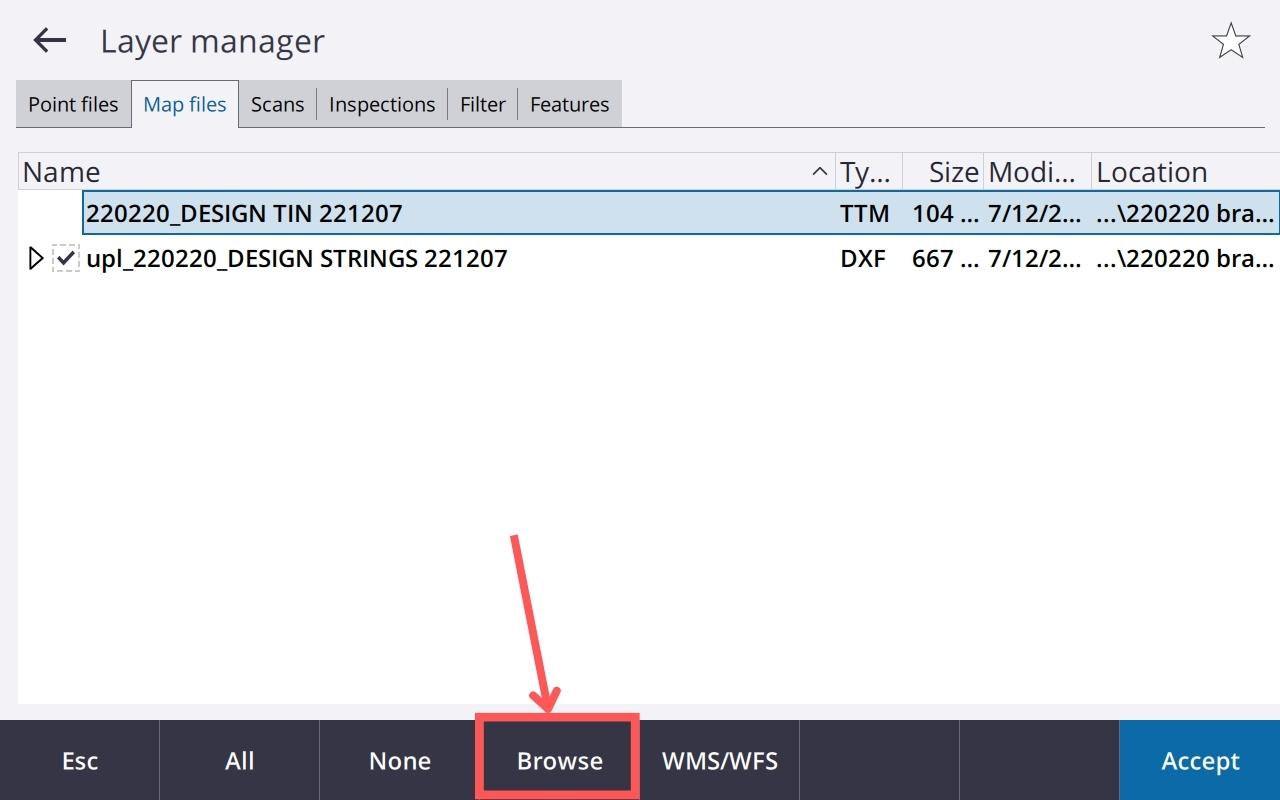
Click browse to search for the new DXF you want to add. The DXF can be either stored on the controller or on a USB stick.
-
Select DXF file
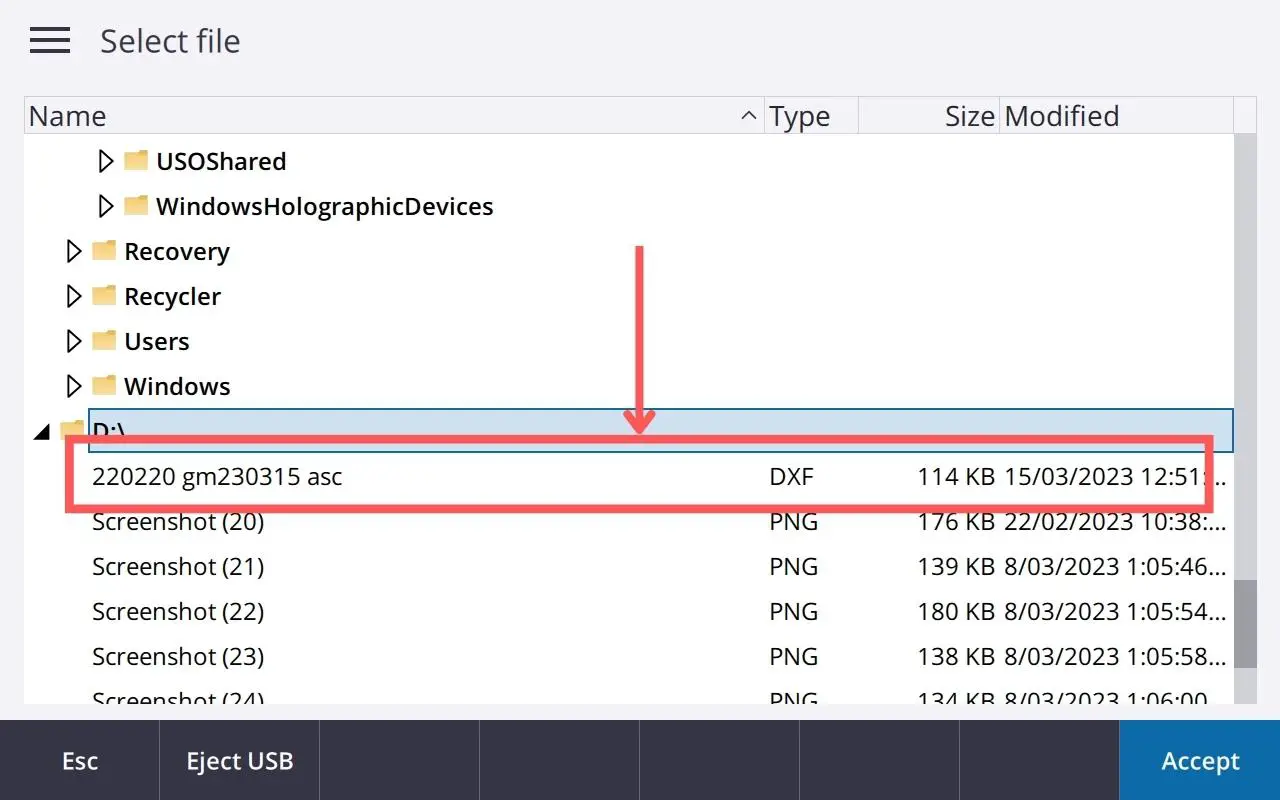
Once you have found the DXF file, click it to add it to the job.
-
Activate the DXF/map file
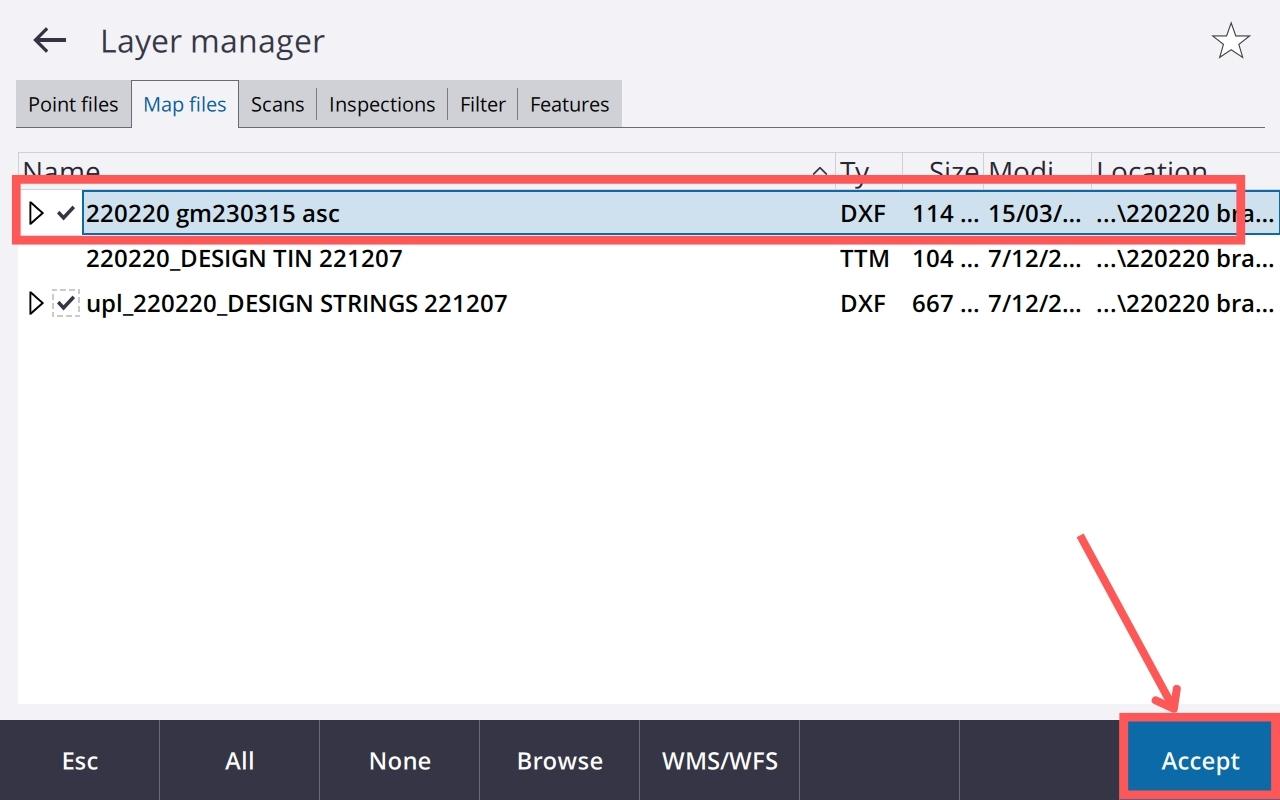
There are three visibility/usability states for map files in Trimble Access.
1. Not selected – this means that the map file/DXF won’t be visible in the map view.
2. Selected (ticked only) – this means that the map file/DXF will be visible in the map view.
3. Selected & active (ticked & a box around it) – this means that the map file/DXF will be visible and you will be able to select it in the map view.You can also select a DXF/map file as viewable but activate only select layers in it by expanding the layer list (clicking the triangle will let you see all the layers).
Set the desired visibility state and press accept.
-
Accept job properties
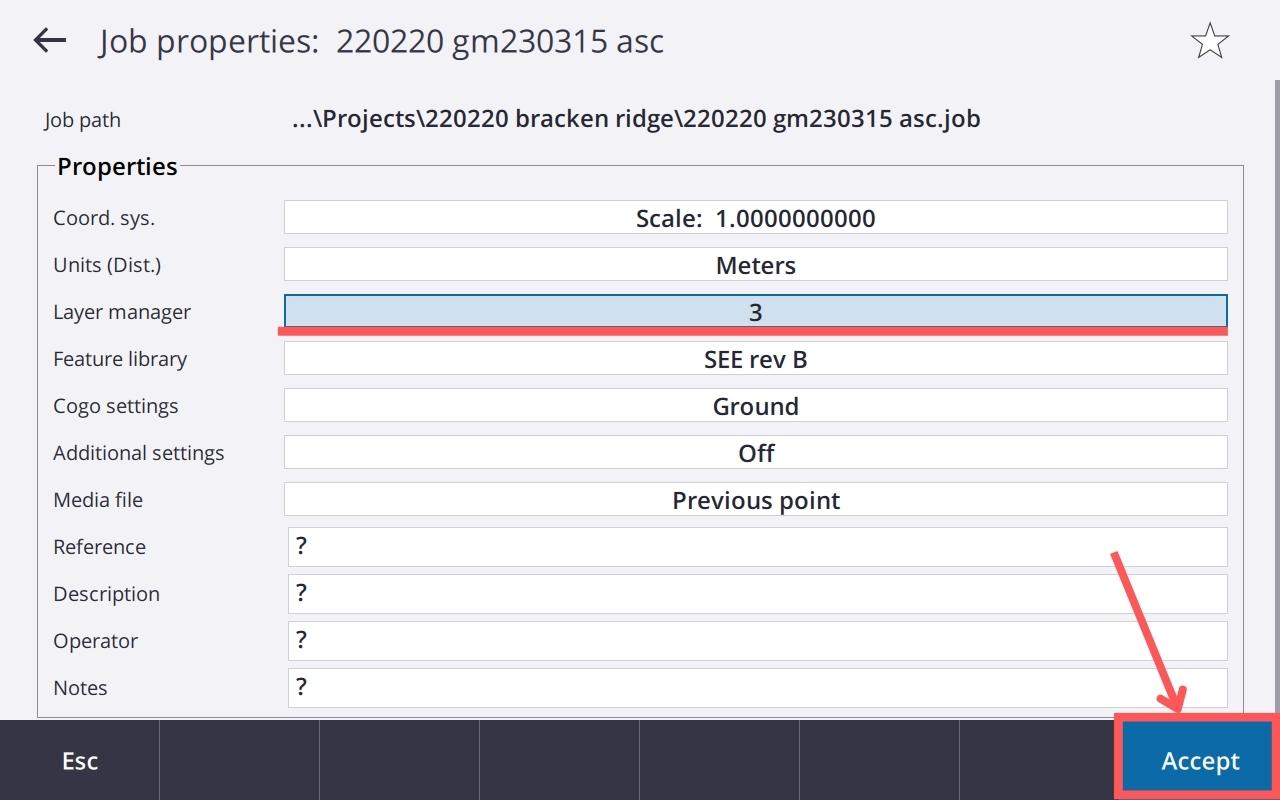
You will see that there are now 3 objects in the layer manager.
Press accept to accept the changes you have made.
-
Open modified job
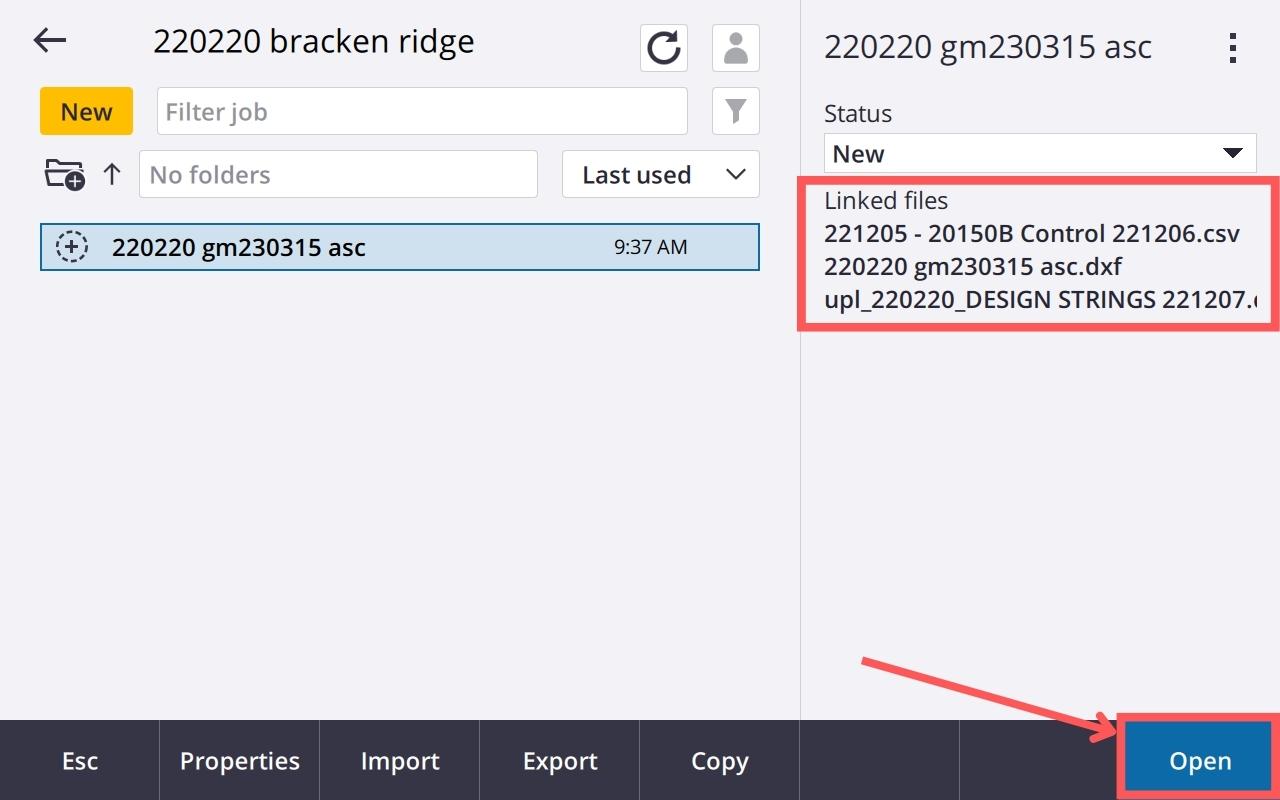
Click open to open the job that you have just made the changes to.

