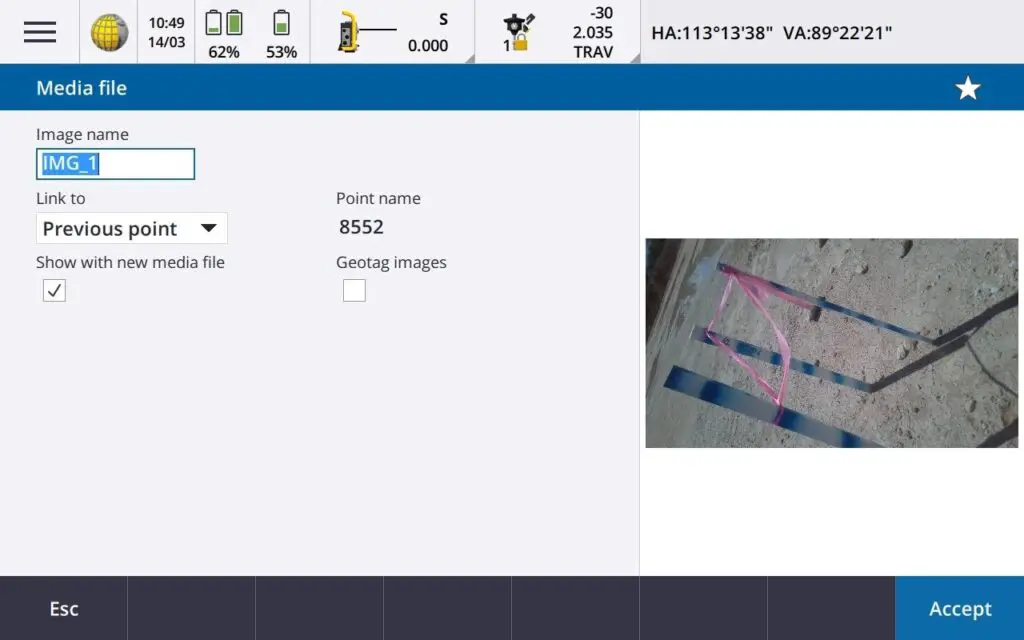
The Trimble TSC7 is able to take and attach/associate a photo to a surveyed point.
This is a great quality control feature that I take advantage of. Once I install benchmarks for other trades to work off, I take a photo of it and attach it to the benchmark surveyed point as proof of what elevation was written on it.
How to take a photo and attach it to a point will be explained in the following 4 steps.
How to take a photo with the Trimble TSC7 and attach it to a surveyed point
Total Time: 1 minute
Open the camera application
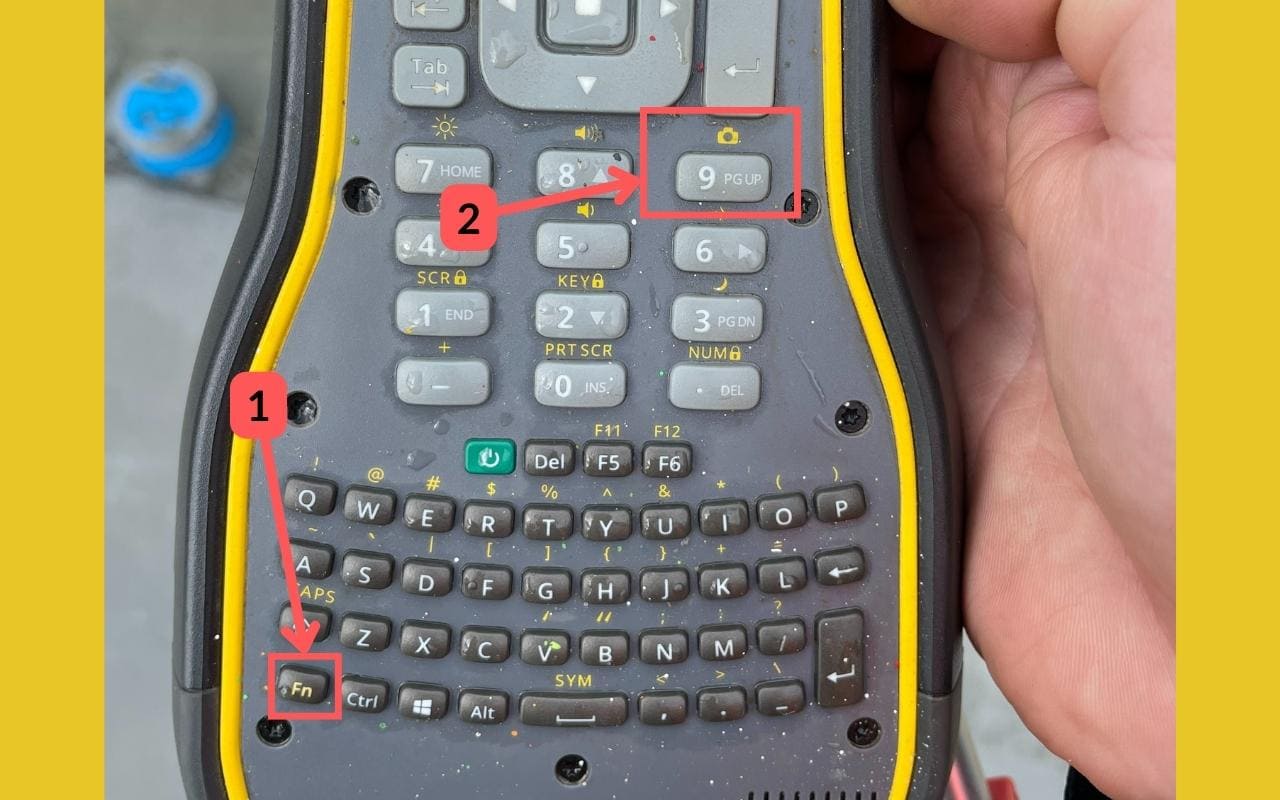
Press FN + 9 to open the camera application. This can be done while setting out or measuring points.
Take a photo
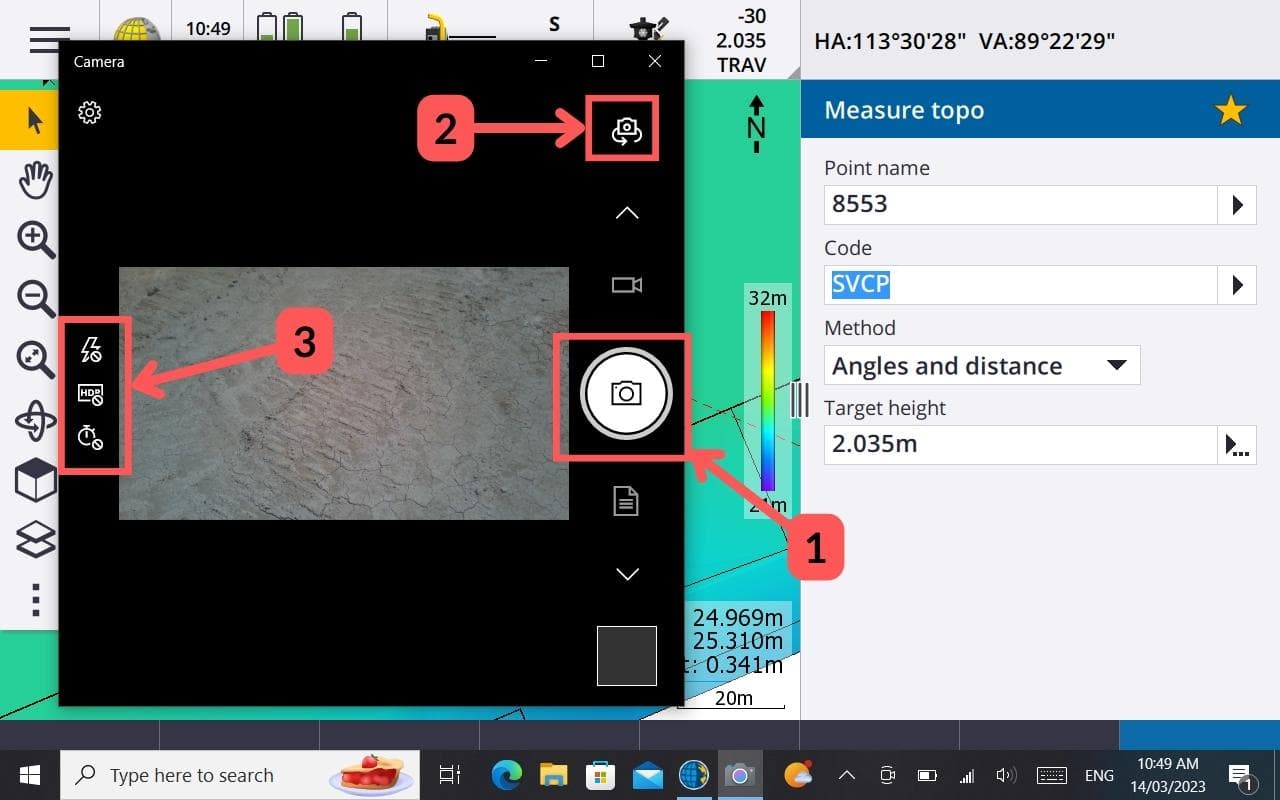
(1) Point your camera at what you want a photo taken of and then press the shutter button.
(2) If you need to swap your camera from front facing to back facing, press this button.
(3) You can modify the flash, HDR and timer settings here.
Close the camera application
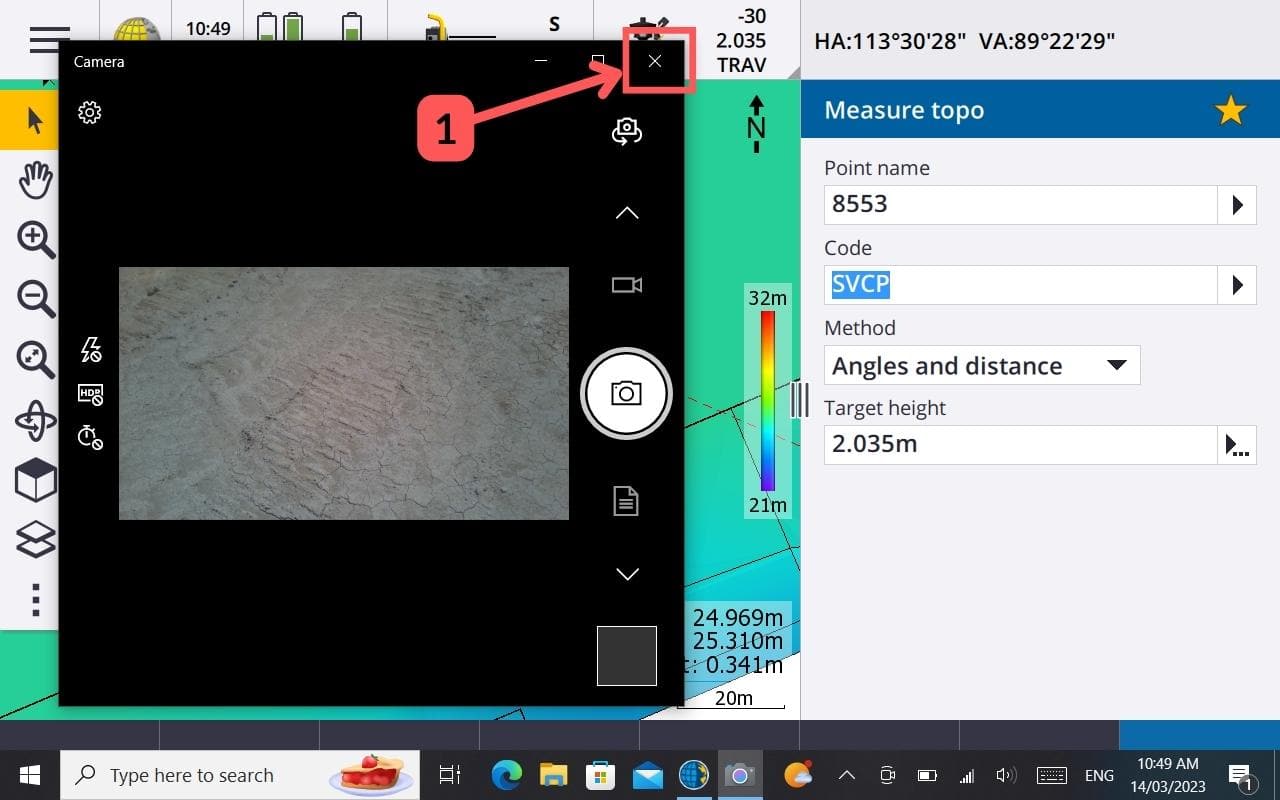
Once you have taken the photo you want, close the camera application.
Save photograph
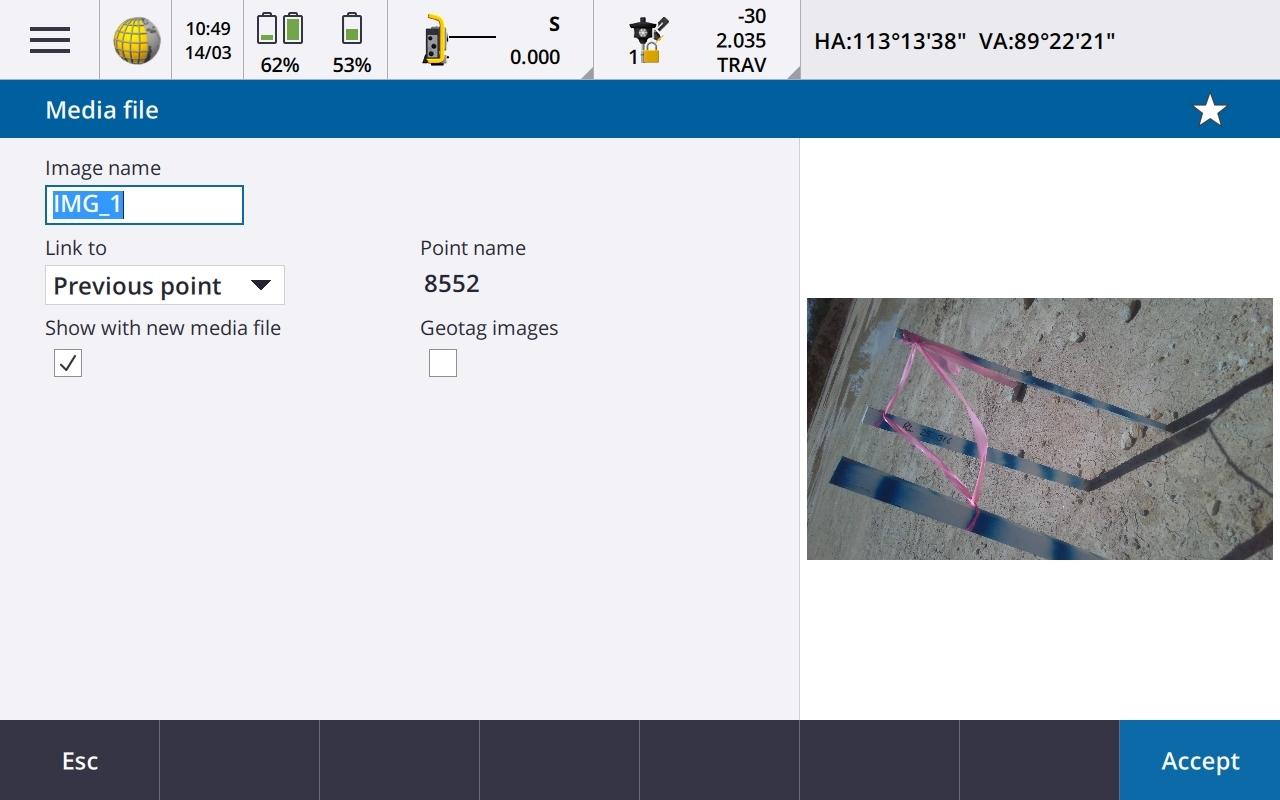
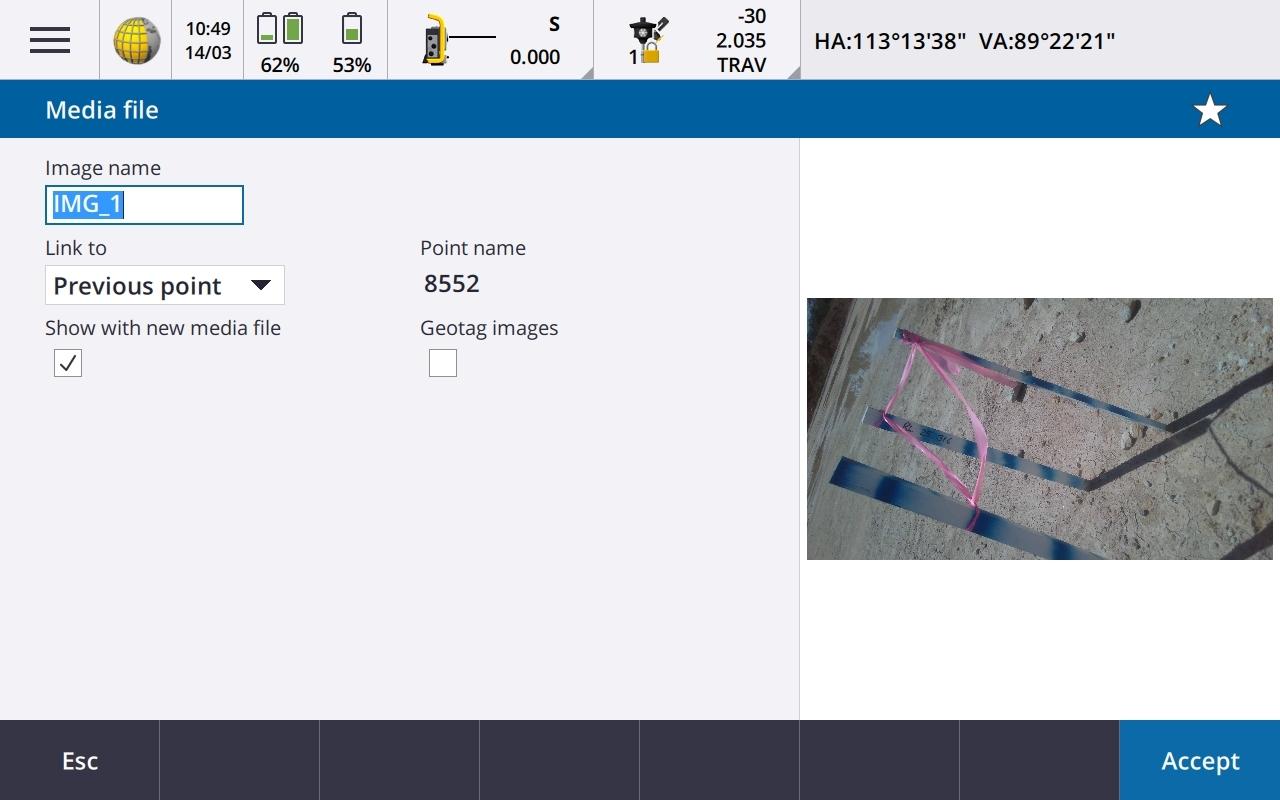
You will then be prompted to save the photo.
You can choose which point you would like it linked to, if it is just the last point surveyed, or if you want to manually choose a point.
You can modify the name of the photo.
Once you are happy, press accept and your photo will be saved and linked to the point you selected.
FAQs
How do you open the camera application on the Trimble TSC7?
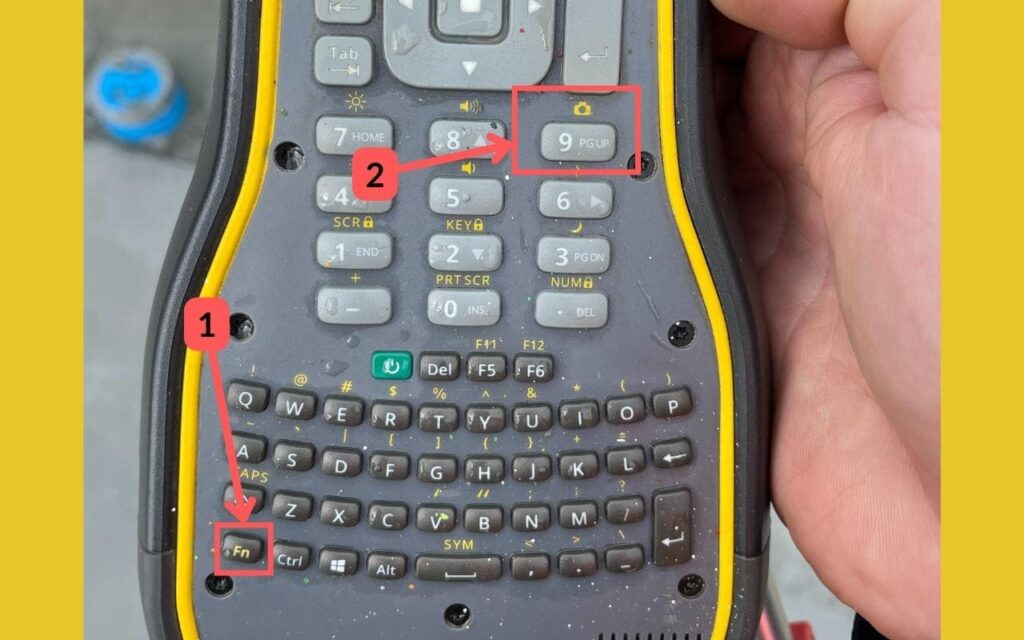
Press FN + 9.

