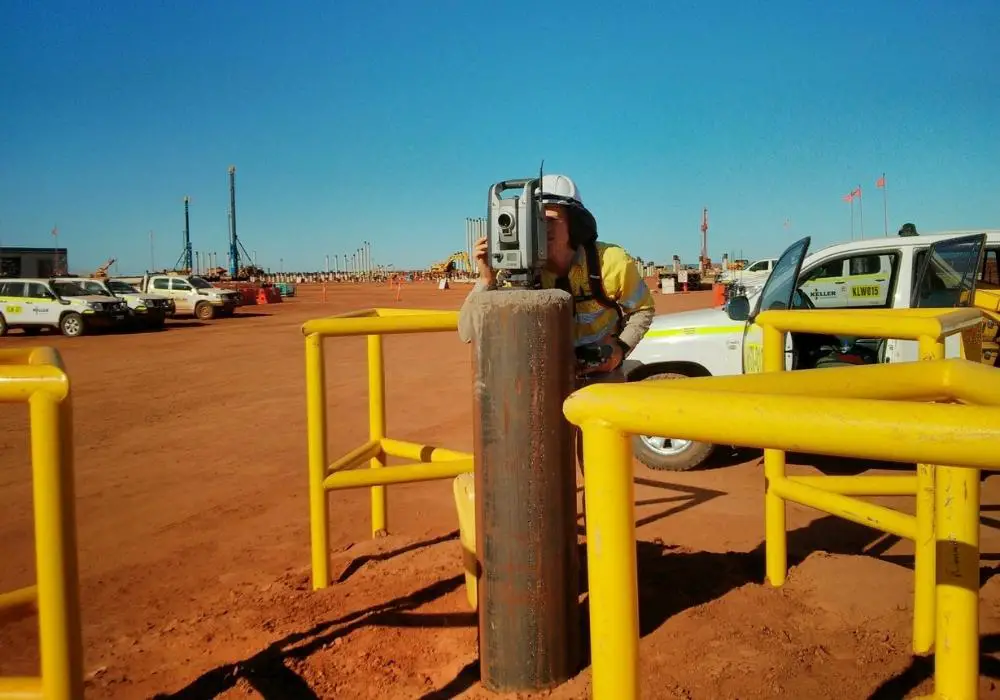
Measuring and storing a checkpoint in Trimble Access can be done from the Measure Topo function.
Read on below to see my step-by-step guide on how to measure a checkpoint with a Trimble TSC7 running Trimble Access.
Why Take Check Shots
Check shots need to be measured and stored regularly during land surveys. Ideally, check shots should be taken:
- After you set up the instrument.
- After you change the pole height of the range pole (check on the last point taken to prove the pole height is correct).
- At least every hour while doing a topography survey. If you are doing construction setout then checks should be more regular than that.
- If the tripod was bumped or tapped.
- After completing a survey, a backsight check shot is the last point to measure and store.
How to get a check measurement to a point using a Trimble TSC7 with Trimble Access
Total Time: 2 minutes
-
Open The Menu

In the top left of the screen of the Trimble TSC7, select the hamburger menu button.
-
Open Measure Topo
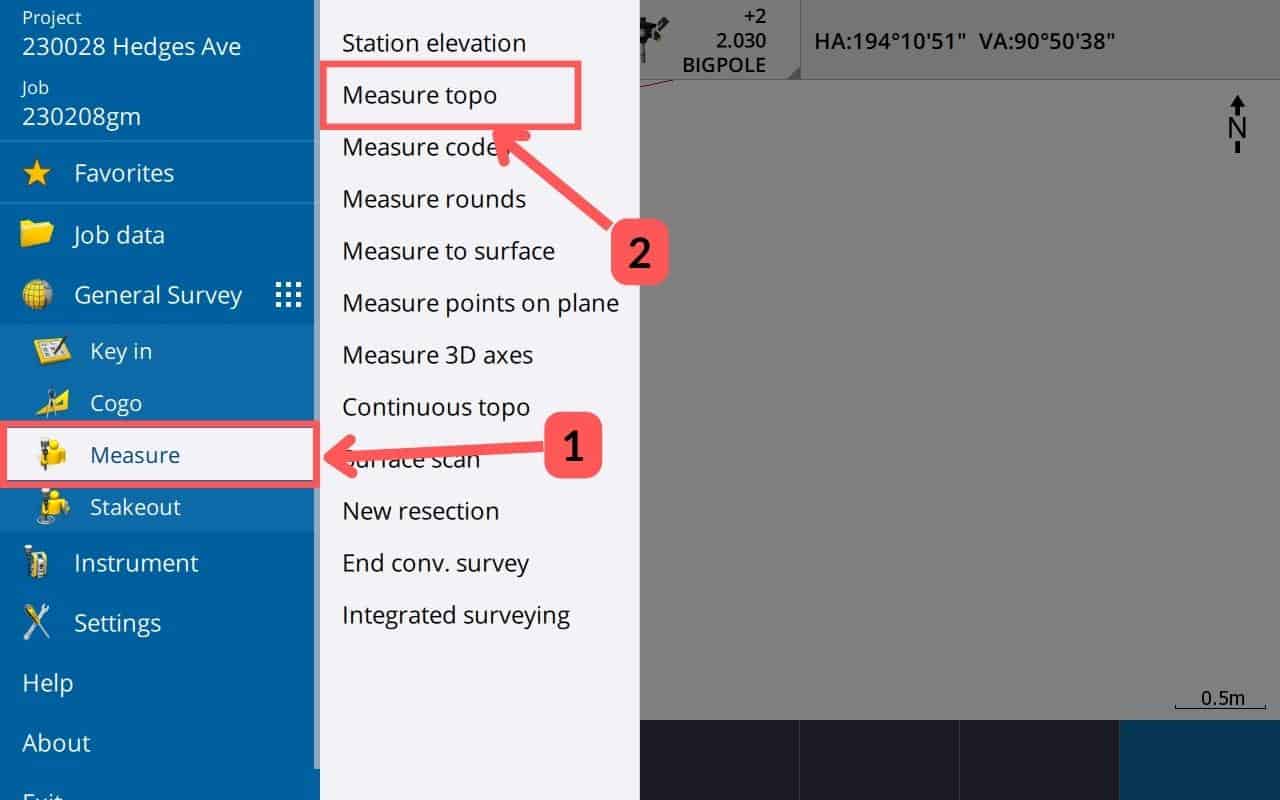
From the opened menu, select Measure (1) >> Measure Topo (2).
-
Start Check Shot
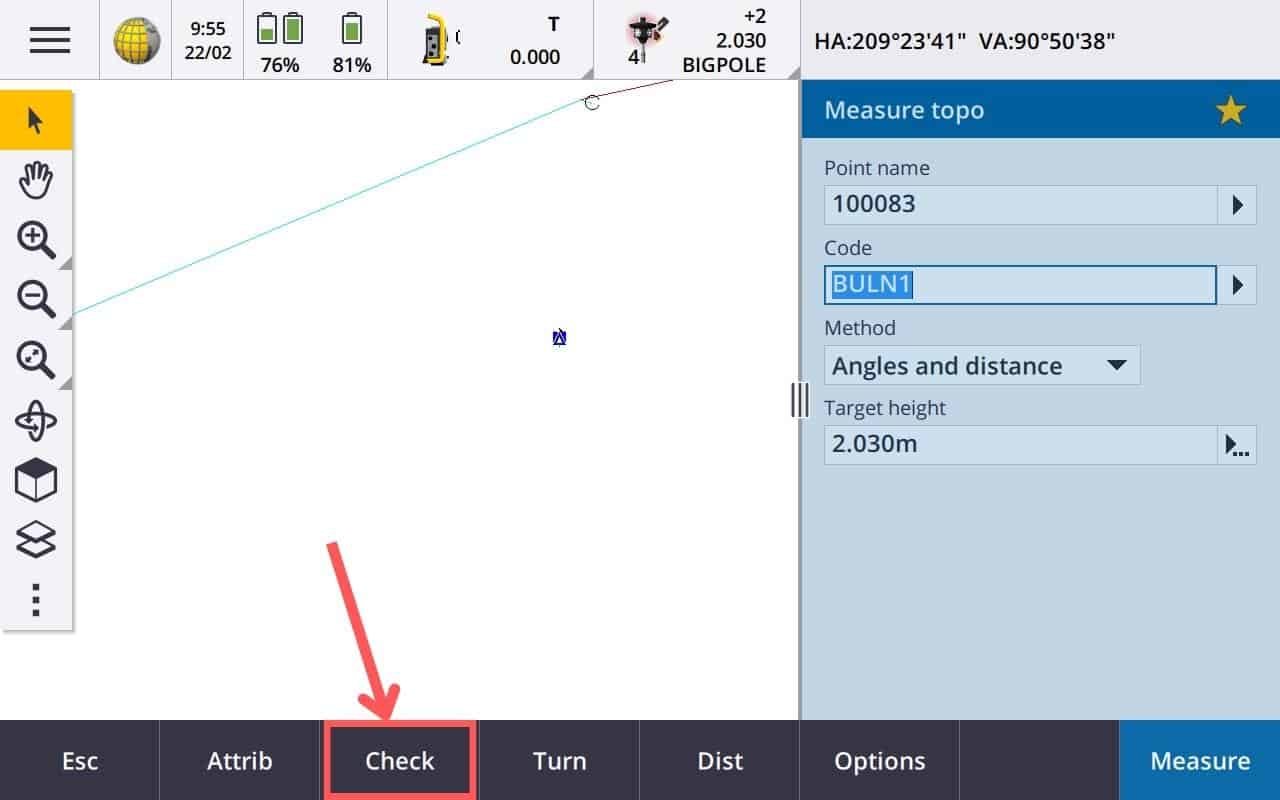
In the bottom button options, select Check to get the check measurement.
-
Select Point to Check
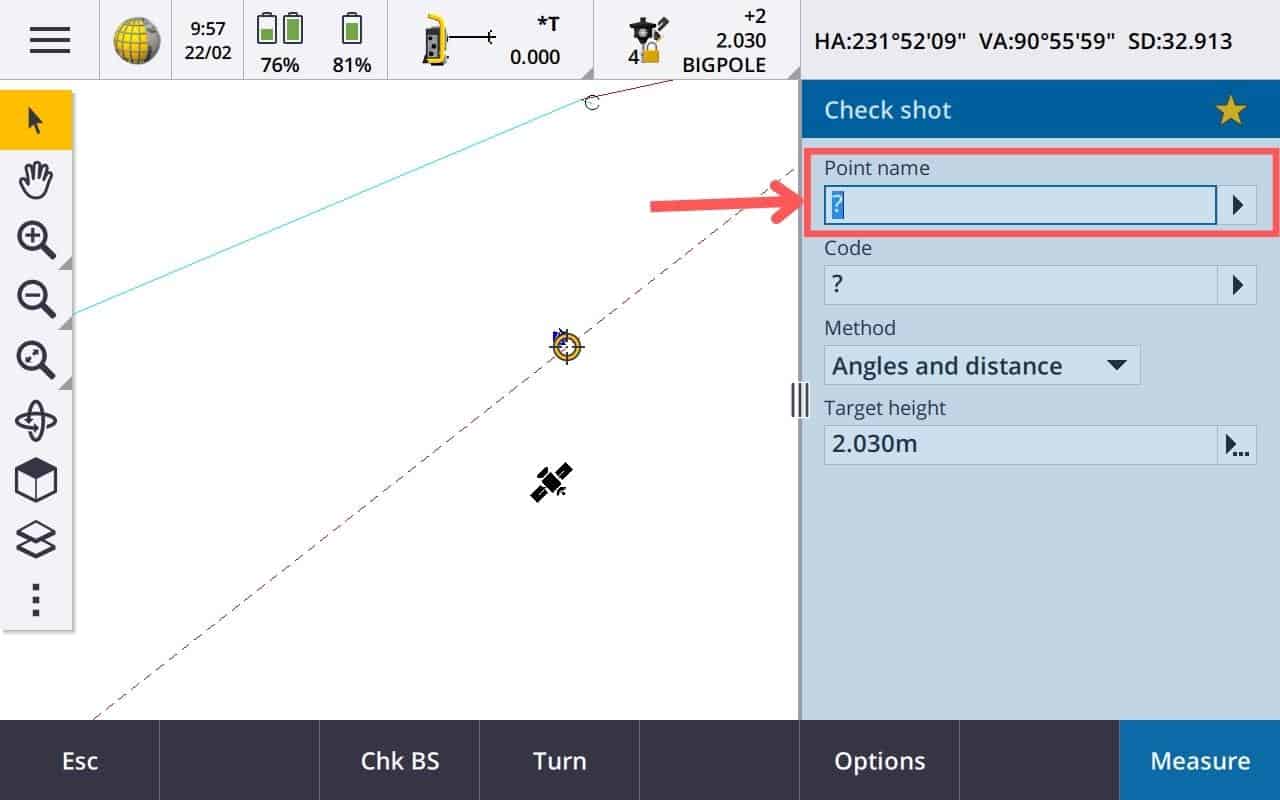
You can select or enter any point you have already surveyed or linked to your job. Either enter the point name if you know it or select it from the map. Check the Method and Target Height is correct for what you need.
-
Measure Check Point
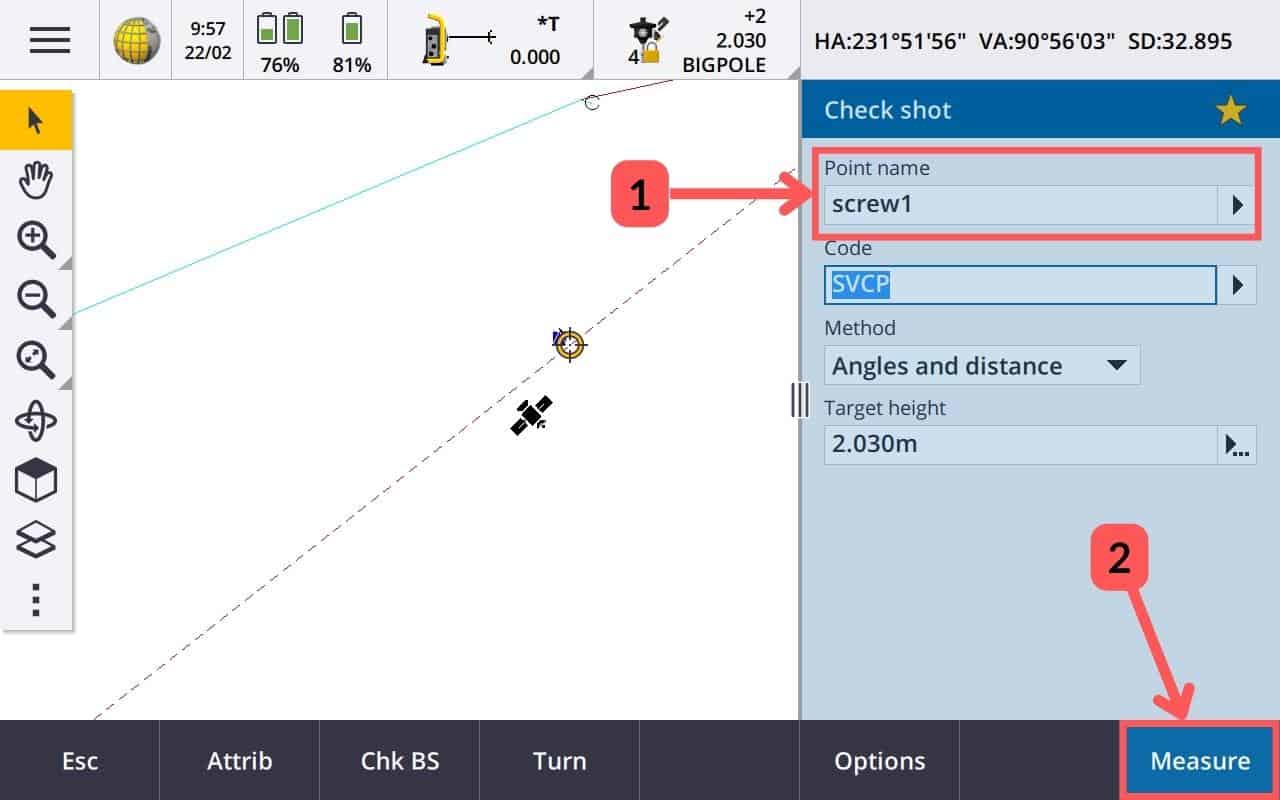
Once you have selected the checkpoint (1), press measure (2).
-
Review and Store Results
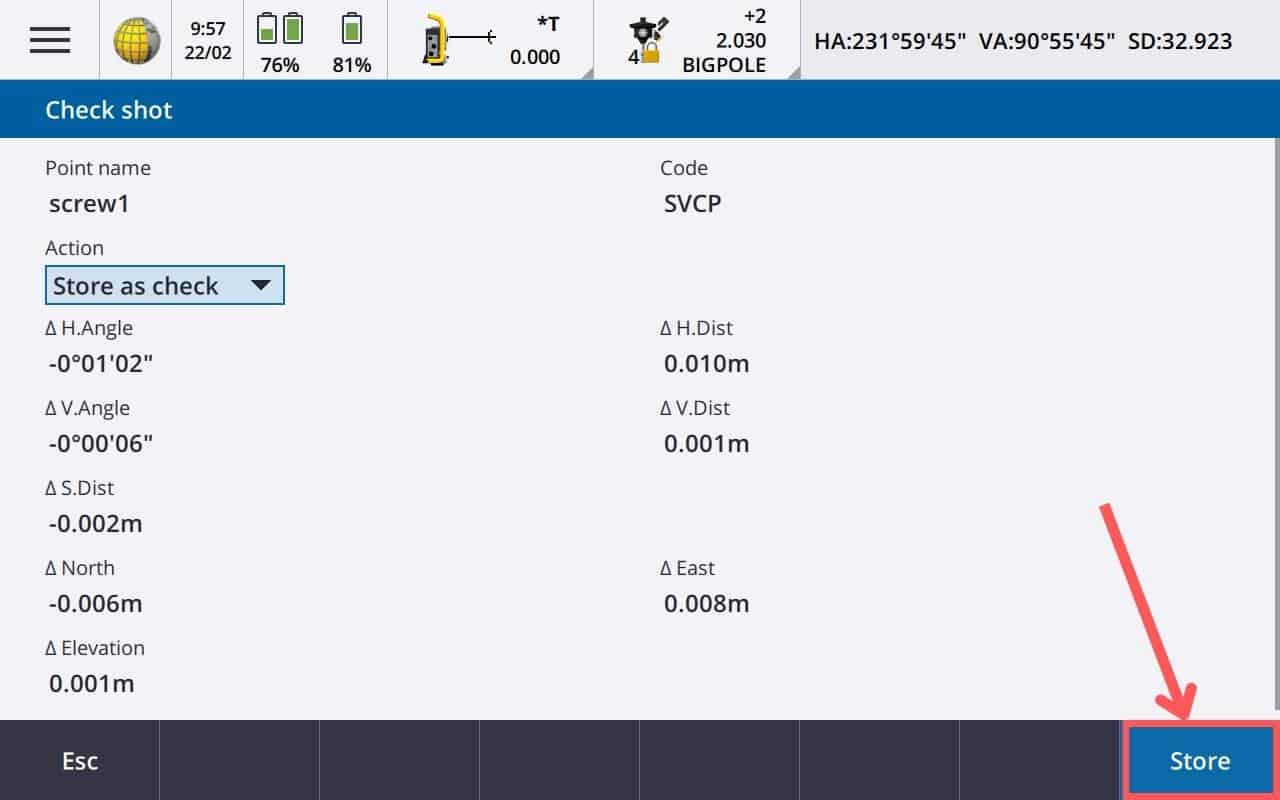
Review the Check Shot results to ensure they are within what you would accept.
If you are happy with the horizontal and vertical deltas and happy with the action (in my case, I wanted Store As Check), then press store at the bottom right.
Once stored, you will be back at the measurement screen and can carry on with your topo survey.
-
Check Shot Actions
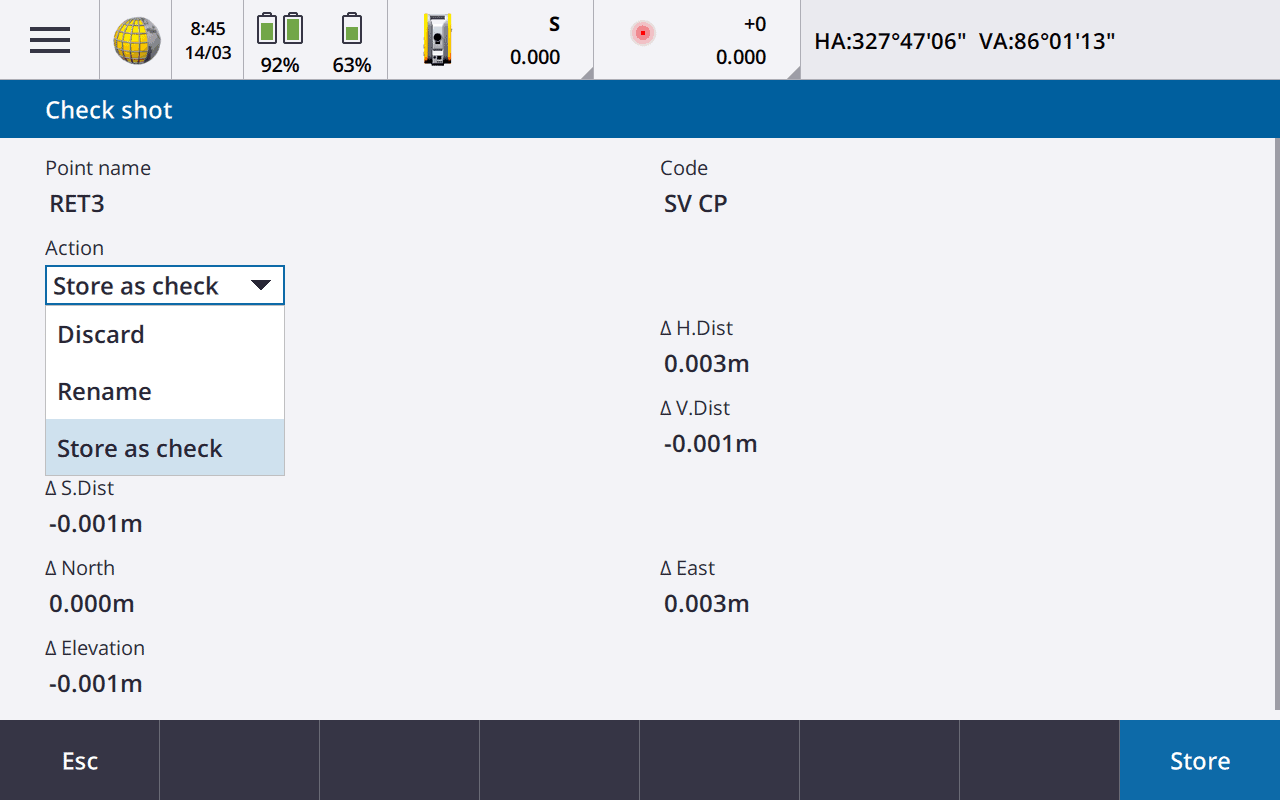
The other options that you can do when getting a check shot is Discard or Rename.
You would only select discard if you were unhappy with your measurement, and wanted to redo it.
If you wanted to change the name you could also do that. Personally I find it better to have the check shot named the same as the control point.
